A painter may use many boxes to organize their workspace, but in the end, what are the storage boxes containing? After a while, we forget, we do not know any more. Then we lose the energy needed to find out what’s in there. What could be the solution?
- 1/ Transparent plastic boxes. This is convenient but not so cheap.
- 2/ Customize old boxes from the studio. This is convenient and beneficial !
In the following tutorial, I will give you my magic trick. Tadaaa !! .
“Oh Pretty Box, what are you hiding?”
That is the question… and in the photo below, you do not help me.
– Idea & Tutorial –
1/ Material:
- 1 Cantilever Materials Box
- 4 tubes Royal Talens Amsterdam Acrylics Paints
- 1 or 2 Flat Brushes
- 1 Scotch Masking Tape Roll
- 1 Spalter
- 1 tube Marabu 3D Paint
- 1 Chalkboard Paint (black)
- 1 Chalk
- 1 Sandpaper Sheet
- Small screwdrivers
2 / Preparation of the box
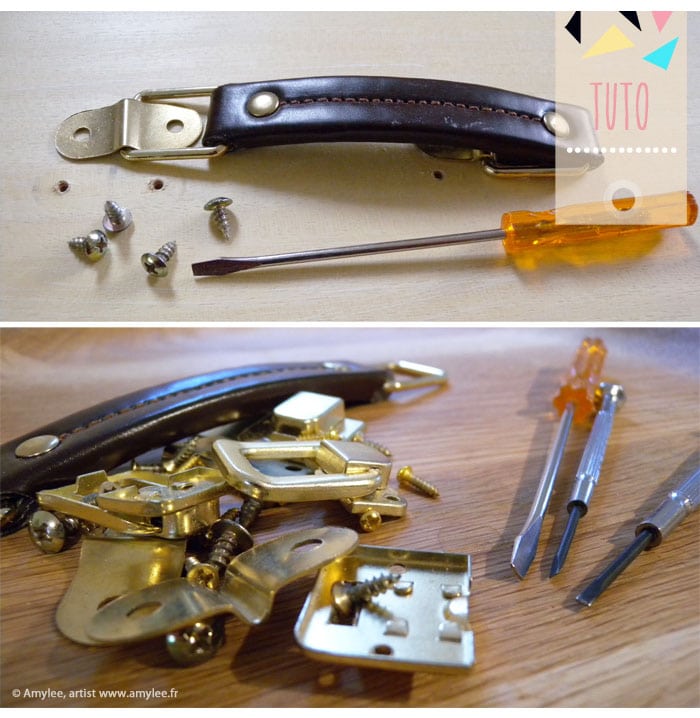
Carefully empty your wooden box. Using a small screwdriver, remove all metallic parts (handle, locks and hinges). Put them aside because you’ll need them after drying. And now, your box is ready to be customized!
3 / Makeover
The makeover will be done in 2 parts.
1 / Change the lid to a ” Black board” for writing on.
2 / Decorate the box to give it a personal touch.
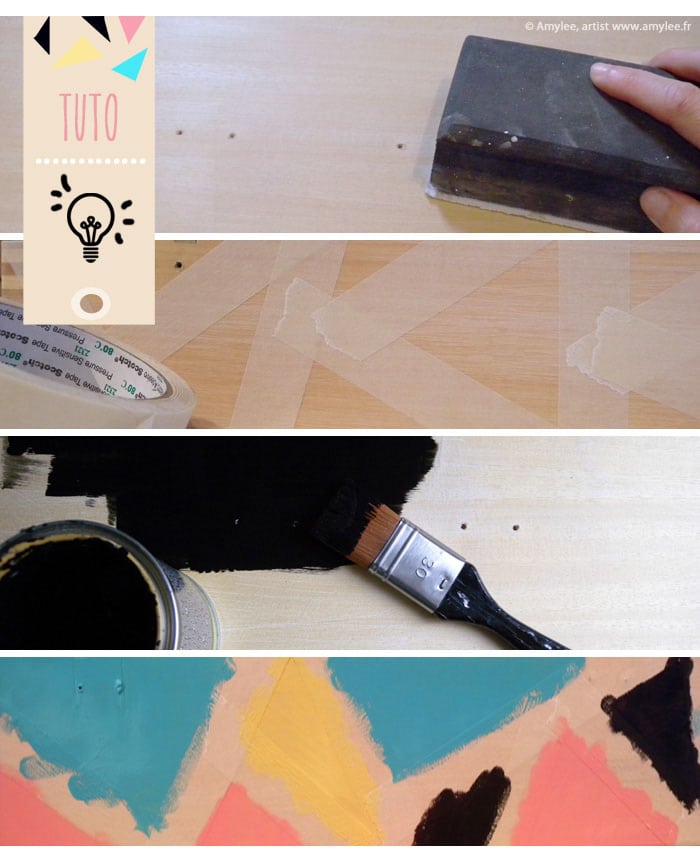
- With a piece of Sandpaper, sand the entire box (body + lid)
- Using Scotch Masking Tape, “draw” triangles on the lower part of the box, then paint them in different colors.
- No need for masking tape on the lid. Take only a Flat Brushe with some Chalkboard Paint, and apply 3 or 4 layers of this magical paint!
NOTE: To avoid any small problems during painting, I suggest you start with the lid and after final drying decorate the rest of the box with the motifs.
4 / The End
- Once all layers are applied and completely dry (cover + triangles), gently remove the tape.
- To give a stitching effect to your designs, take the 3D-Liner and draw dotted lines around the triangles.
- For the ultimate finish, you can varnish the part with the triangles preventing the lid (Chalkboard Paint) from damaging their effect or the other way round.
- As soon as the box is completely dry, you can put all metal parts back on.
5 / The “Transparent” Effect
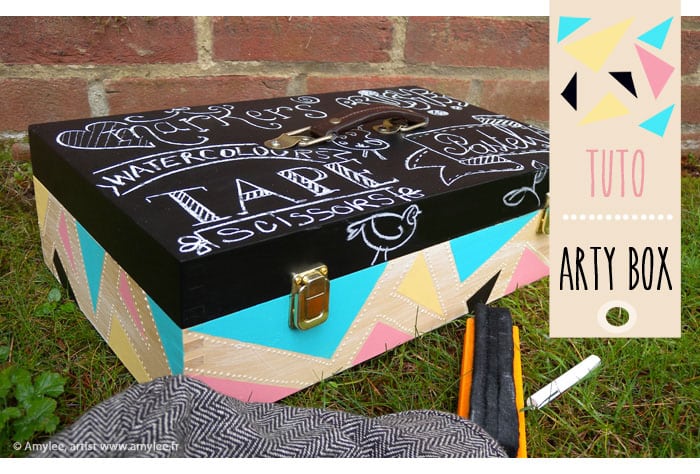
The customization of the box is almost over… How to make it “transparent” you say?It’s easy. Take a piece of Chalk, note on the cover what’s inside… Magic, no need to open to know the content!!! Hehehe, fun isn’t it?
NOTE: If the content of the box changes, remove the notes on the lid using a dry cloth or sponge to erase. If you’re worried that Chalk fades too quickly, there are chalk markers available which can be erased with a wet cloth.
6 / Tips
To have more than just words, I used different fonts and styles.And now, you know everything that’s in my box without opening it too! So, when I tell you that my box is “transparent”, you believe me now, don’t you?!
DISCLAIMER : cet article est une collaboration sponsorisée. Je fais partie des artistes référents qui utilisent le matériel proposé par Le Géant Des Beaux-Arts – France et GreatArt – United Kingdom. Vous venez de lire mon article issu de cette collaboration. Au risque de me répéter, sachez que j’apprécie les marques distribuées par ce partenaire depuis des années, et que je suis convaincue de la qualité du matériel destiné aux artistes et aux personnes créatives. Même si cela paraît logique, je précise que je suis LIBRE sur la thématique et le choix des produits mis en avant, LIBRE sur le contenu, LIBRE de donner mon VÉRITABLE avis, et c’est également pour cette raison que ce partenariat est important car je peux donner libre cours à mon imagination et ainsi proposer du contenu frais et de qualité.


