Combining wood and aluminum, with extreme stability, Museo Alu Stretchers are part of the new generation of frames that will be with the artist for years! The reinforced structure allows robustness and larger sizes! I tested and participated to the building of one of these new frames. Here is my article:
.
Bars (+ Accessory Set) and Support Bar (+ Accessory Set)
01/ Material:
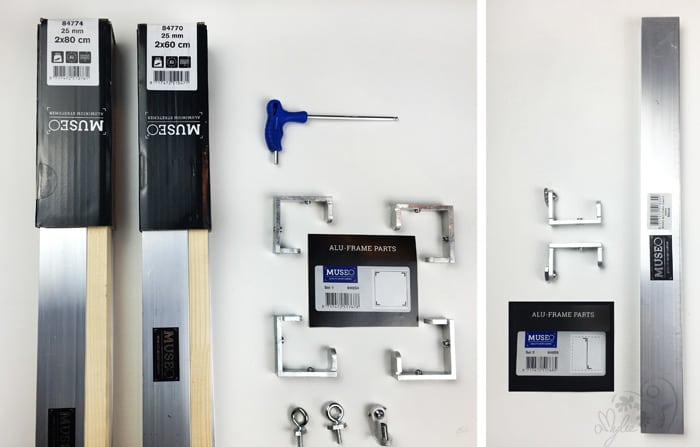
The accessory sets for a frame are delivered with 2 bars (made of rails). In order to build the frame in 31’’x23’’(80x60cm), you’ll need:
- 1 set of Museo Alu Stretchers – 60cm/25mm profile
- 1 set of Museo Alu Stretchers – 80cm/25mm profile
- 1 set of Museo Alu Support Bars – 60cm (adding only the frame exceeding 20’’ or 50 cm square)
Do not forget to add Accessory Sets for Museo Alu Stretchers
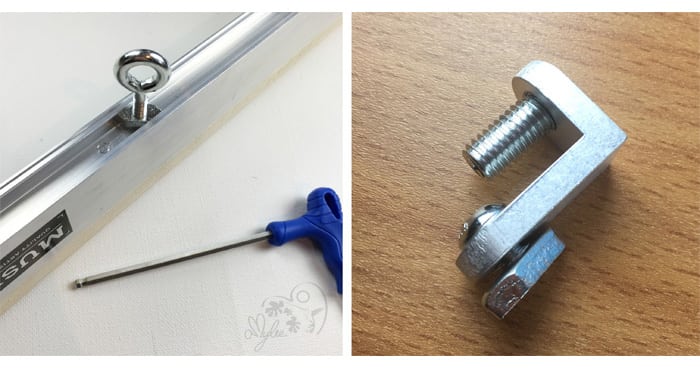
- 1 assembly set 1: 4 corner connections, 1 tensioner, 2 hangers and 1 Allen key. This item is essential to create you stretcher frame from Museo Alu Stretchers.
- 1 set 2: 2 support bar connectors.
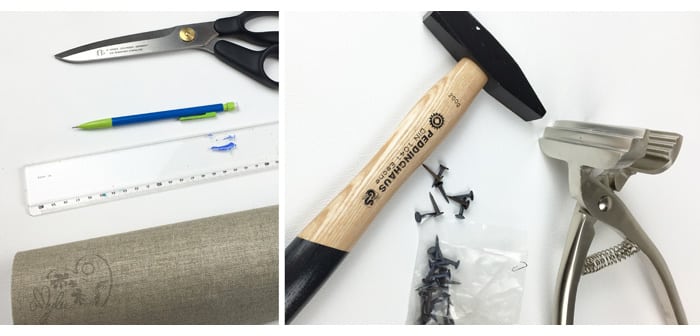
- 1 Primed Linen or Cotton Canvas roll (100x90cm or 40’’x35’’)
- 1 Canvas Stretching Pliers (not obligatory)
- 1 pencil and ruler
- Tacks and hammer (or staples and stapler)
02/ Mounting frame:
- Total time to build the frame (without the canvas): 5 to 10 minutes
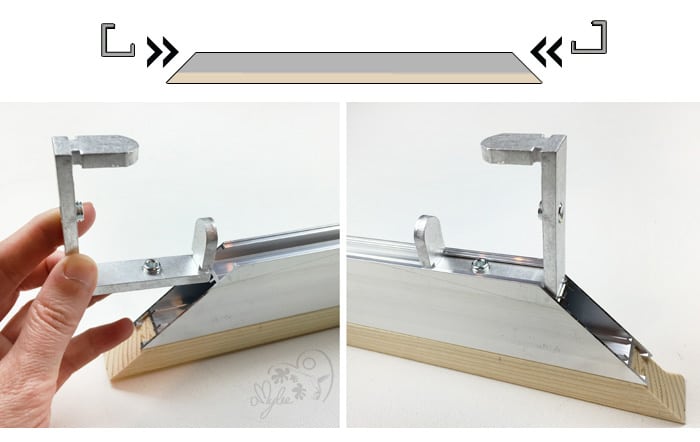
Sit on a flat surface, place the 4 bars of the frame and accessory kit.
First mount the bottom of the frame. In each end of the bar insert the 2 corner connections in the rail for this purpose.
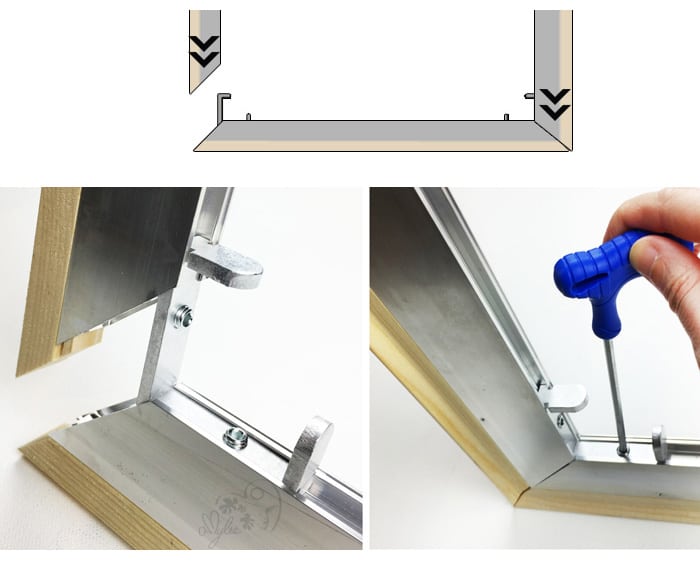
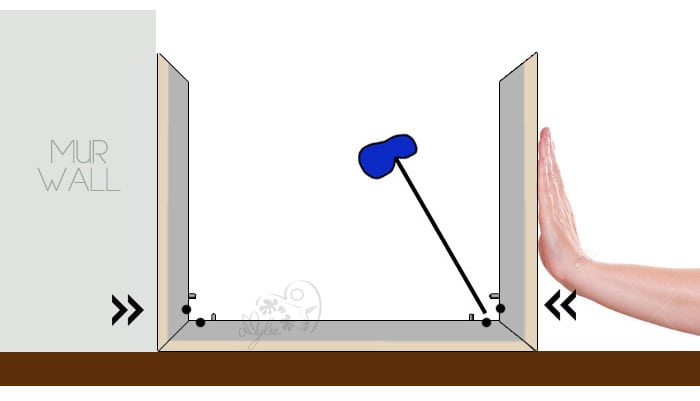
Then take the other 2 bars to form the sides of the chassis. Drag them to the corner connections of the bottom bar. (Check out the pic just below).
Once the 3 sides joined, screw the 4 fixing points by using the Allen wrench.
TIP: Easy way, do not hesitate to block all against a wall and pushing on the opposite corner to keep everything in the screws.
3/ Alu support bar:
These Museo Alu Support Bars are designed for reinforcing the Museo Alu Stretchers frames. They can be added without disassembling the Museo Alu frame.
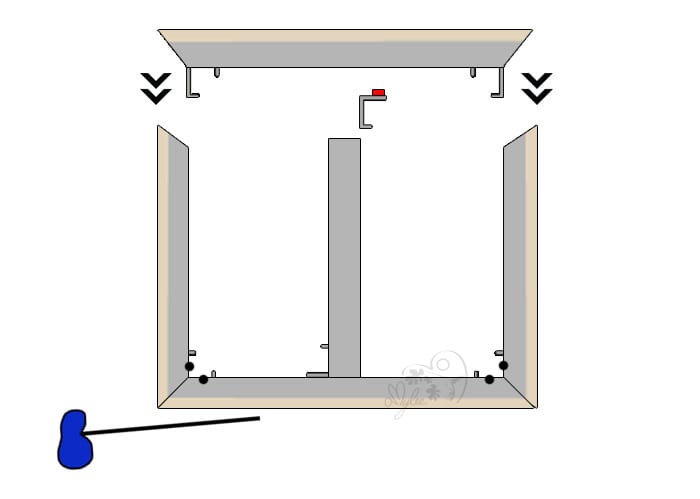
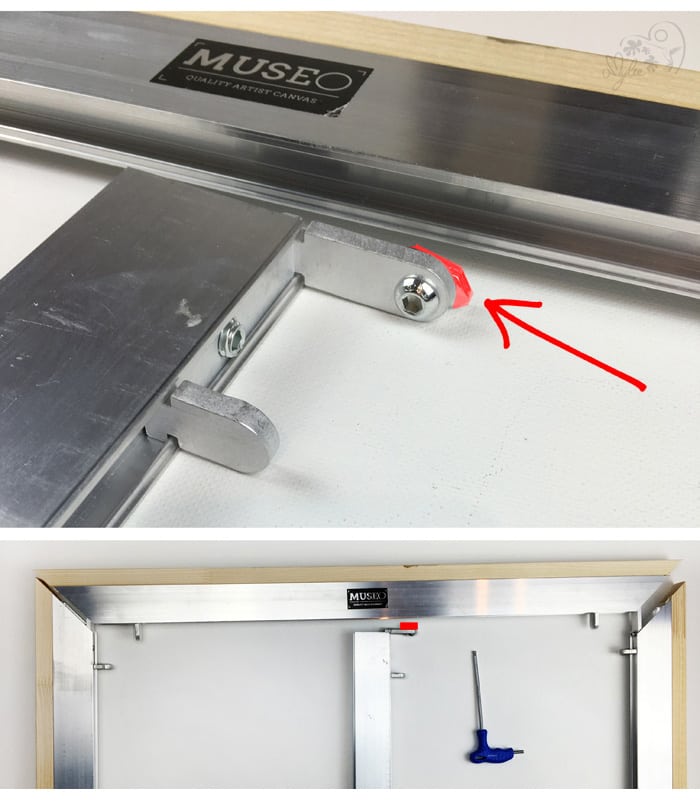
Before closing the top of the frame, place the support barin the middle, making sure to slide the two corner connections at each end of the rail.
First, block the bottom of the support bar. A small rotary latch (in red on the legend) provided under the corner connection, it allows it to attach to the rail of the bars. To attach the support bar then block the last bar to close the frame.
Remember to screw all corners as well as those of the bars to strengthen the overall structure of the frame.
Here you are! Your frame is mounted! You will then need a canvas, and accessories to measure, cut, stretch and secure.
.
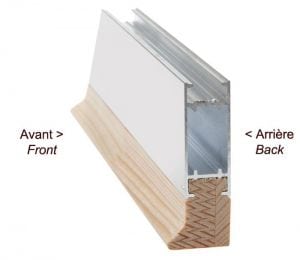
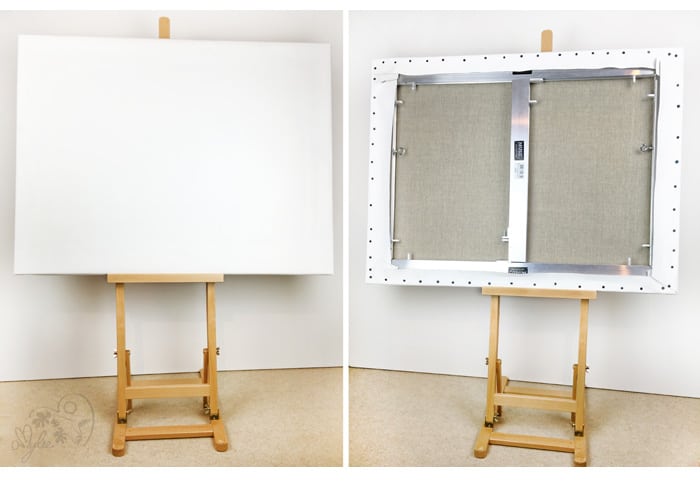
TIP: How to check the front and back of the frame?
The front of the frame is slightly curved while the back is flat.
4/ With Canvas roll:
In this tutorial, I used a Primed Linen canvas roll.
- Front side: the canvas is white coated and ready to paint.
- Back side: the canvas is raw and natural.
Unroll a meter (39″) of canvas and place the flat while ensuring the canvas have undressed to you. Place the frame over with the back of the frame facing you. Allow 10 to 15 cm (4″ or 6″) margin around the frame and cut the canvas.
5/ Back of the frame:
You can take some Tacks and a hammer but stapler is good as well.
- Fold the canvas over the 4 bars of the frame like a gift package.
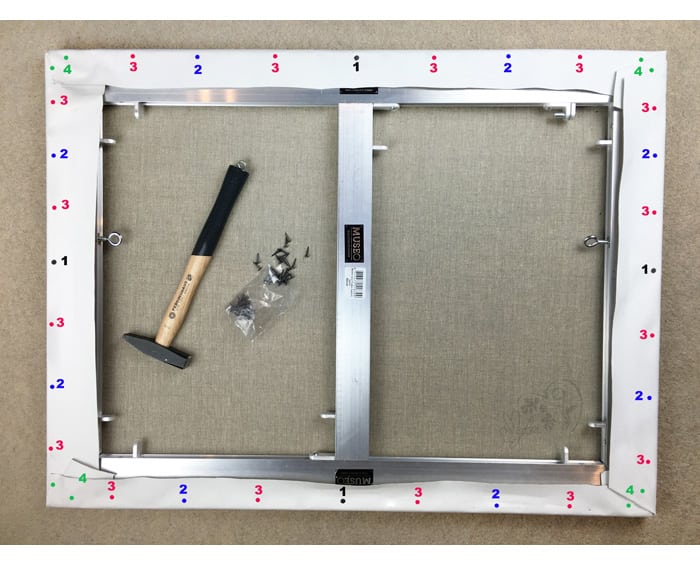
- for tacks, always start by the middle of the folded side making sure to pull the canvas (using Canvas Stretching Pliers) before putting the tacks / staples.
- Help you with the photo below following colours points: first the black, then red, blue, and green to complete folding the corners. I spaced every 4 to 5 cm (1 or 2 inch)
6/ Hangers and Tensioner:
- 2 HANGERS: The hangers are provided in the set 1. To attach the hanging system of the picture, the operation is identical to the fitting of corner connection of the support bar. Rotary latches then fit into the track rods then be maintained using screws.
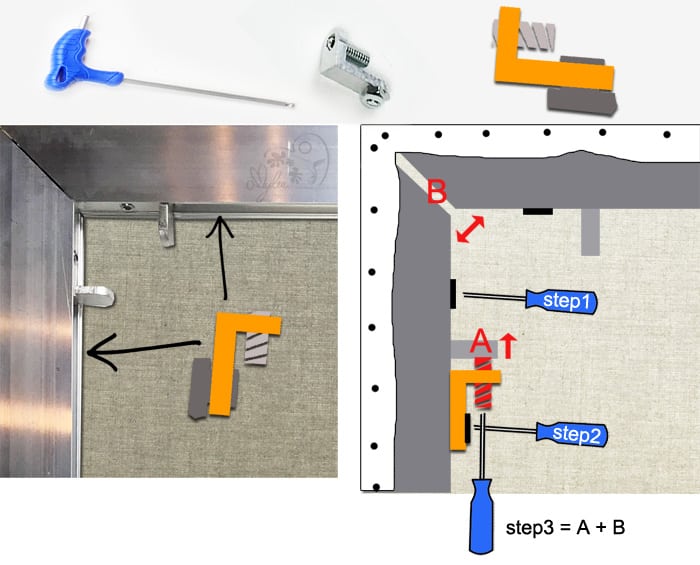
- 1 TENSIONER: It is located at the back of the painting and serves to balance the tension of the canvas. 1 single tensioner is necessary for each 4 corners of the frame.
- The tensioner is to be positioned against one of the 4 corner connection of the frame. Its rotary latch system can be inserted into the rail.
- Before using the tensioner, unscrew the corner of the frame using the screw inside the corner. Then using the tensioner secured with the latch, turn the long screw which pushes the corner connection and causes the opening of the corner of the frame.
More screwing over the corner opens. You can go back if you feel that the corner is too open or the canvas too stretched.
This operation may be applied to the 4 corners to stretch better the canvas. To my opinion, I stretch my canvas once painted and dried.
Here we go, my Museo Alu Stretchers is finally ready. Let’s get to work!
8/ My opinion:
I really enjoyed getting this frame. It’s easy, fast, fun, everything fits together, slips and screws by hand. I felt like playing Meccano with my brother.
The rods made of aluminum and wood are solid and heavy enough to give the right strength and good frame. For large size it is ideal.
All aluminum is rather nice. Its modular structure is well thought! A chassis that can be mounted or dismounted and therefore minimize the costs of shipping.
The total cost of the frame is obviously a little more expensive than a high-quality all-wood frame. However I am still looking for my paintings a good quality. In the past, I’ve had some problems with large twisted paintings. So considering Museo solution to avoid these problems in future exhibitions with galleries or customers.
Finally, the most difficult is shopping Museo and get all items at once. Since you are not used to this kind of purchases, you can quickly forget the support bar or accessory.
I can’t wait to paint it, I will keep you informed of my comments.
–
You can find Museo frames range on GreatArt.co.uk
DISCLAIMER : cet article est une collaboration sponsorisée. Je fais partie des artistes référents qui utilisent le matériel proposé par Le Géant Des Beaux-Arts – France et GreatArt – United Kingdom. Vous venez de lire mon article issu de cette collaboration. Au risque de me répéter, sachez que j’apprécie les marques distribuées par ce partenaire depuis des années, et que je suis convaincue de la qualité du matériel destiné aux artistes et aux personnes créatives. Même si cela paraît logique, je précise que je suis LIBRE sur la thématique et le choix des produits mis en avant, LIBRE sur le contenu, LIBRE de donner mon VÉRITABLE avis, et c’est également pour cette raison que ce partenariat est important car je peux donner libre cours à mon imagination et ainsi proposer du contenu frais et de qualité.


