Today, I give you a very easy and a trend tip to make nice Christmas trees with simple sheets of coloured paper and old brushes. A few minutes and just some material will be useful. I will explain in the following article.
This tutorial teaches us how to create a small paper fir tree to decorate the studio, the Christmas table or yummy pastries that we like to enjoy on New Year’s Eve.
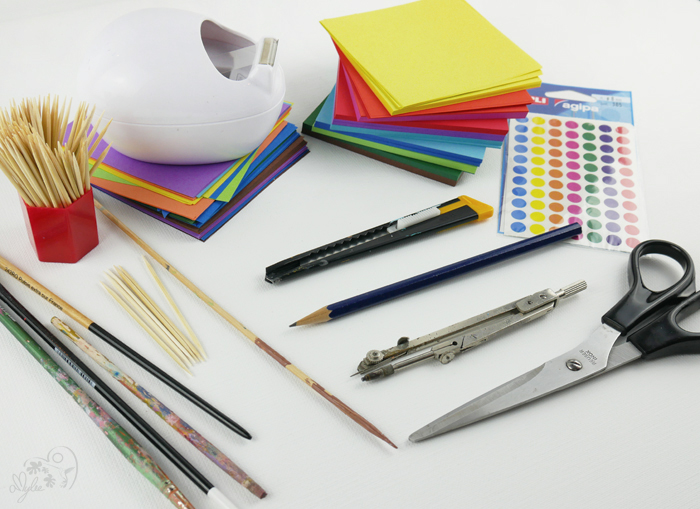
MATERIAL
- 12 sheets of coloured paper « Folia »
- 1 scissors and 1 cutter
- 1 graphite pencil
- Some thin and long old brushes (or picktooth or Bamboo Skewers)
- 1 Transparent Roll Tape
- 1 compass drawing circles (OPTIONAL)
- Self-adhesive coloured round labels (OPTIONAL)
You can find these items on GreatArt (Shoreditch Store in London or online)
STEP 1 – FOLIAGE TREE
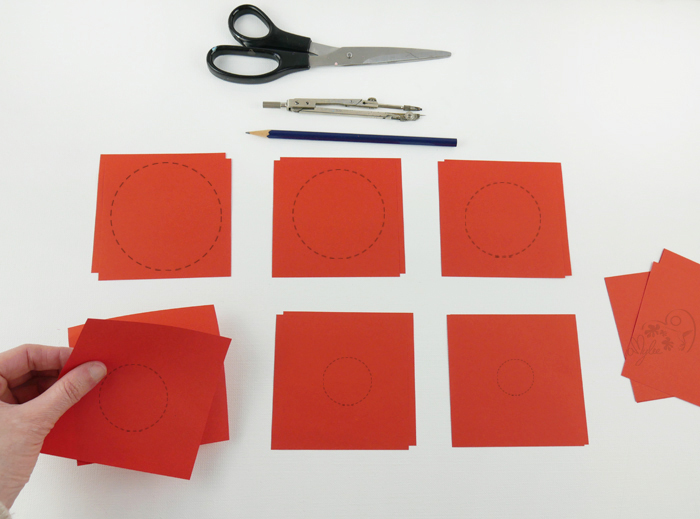
- The sheets of paper used in my tutorial are 10x10cm (or 4”x4”).
- Take 6 square paper sheets in same color.
- Look at my picture above, I double all my sheets, so I have 12 sheets of paper in 6 squares. During all my tutorial, I work on doubled sheets of paper.
- Using a compass (or freehand) to draw 1 circle on each sheet of paper.
- Be sure to remove 5 or 6 mm at each new circle and decrease as the size of the circles decreases.
- To make the tutorial faster, I recommend you always work on doubled paper.
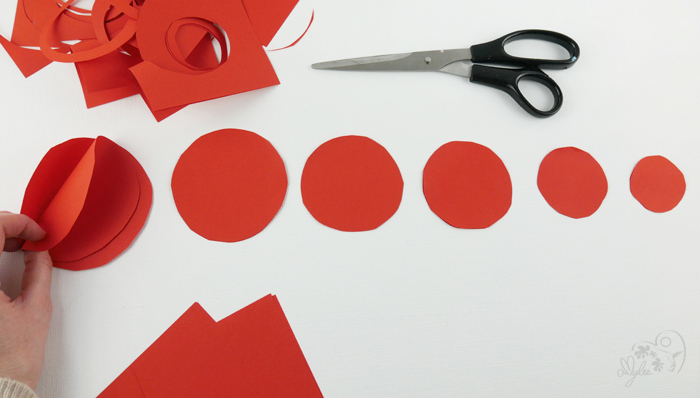
- Cut out the 6 circles (from the largest to the smallest).
NOTICE: Look at my picture, I have 6 circles that have 12 circles cut. During all my tutorial, I work on doubled sheets of paper.
STEP 2 – FOLIAGE TREE
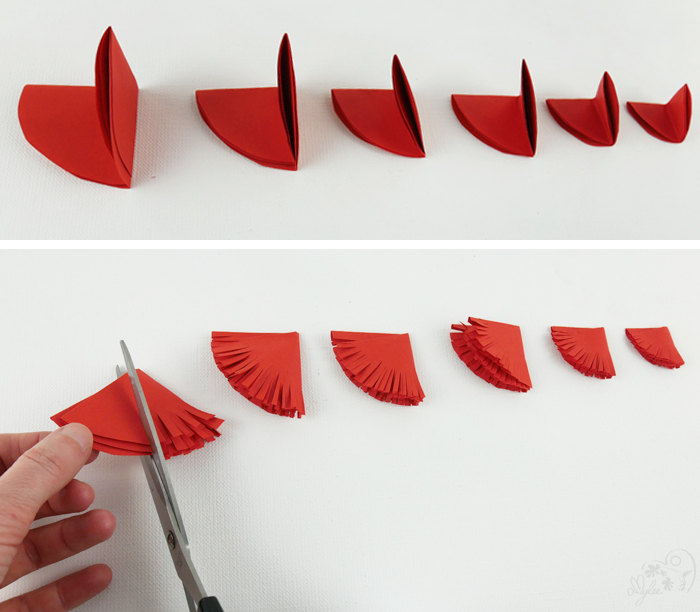
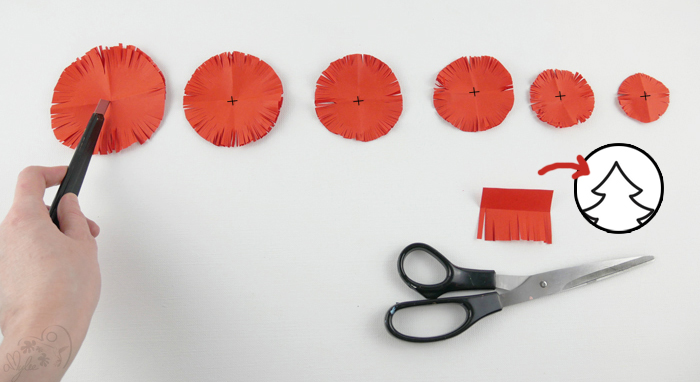
- Once the finished cutting, fold the paper circles (always 2 sheets one on the other) to make ½ circles, and in 2 to fold in quarter-circles (see image below).
- Using the scissors, cut like above with doing cut all around the edge of your quarter circles.
STEP 3 – FOLIAGE & TREE TOP
- Unfold the quarter-circles and lay them flat.
- With the cutter, cut a small cross in the center of each circle. It’s very useful because it then makes it possible to thread the paper rounds along the brush.
NOTICE: Cutter becomes useless with toothpicks or chopsticks because the paper is easily pierced with sharp tips.
IMPORTANT: If you notice well, with the rest of the paper, I made a small folded and fringed strip (1.5 cm (or 0.5″) wide on about 2.5cm (or 1″) high) for the top tree.
ETAPE 4 – FOLIAGE TREE
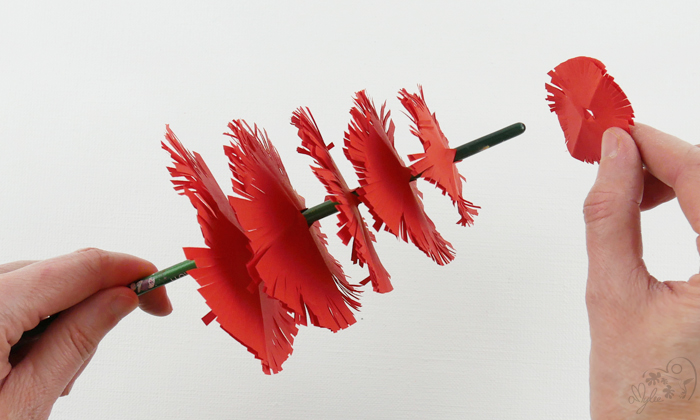
Using an old, long and thin brush, thread the fringed rounds paper (always doubled sheets) along the handle.
STEP 5 – FOLIAGE TREE
- Use the brush handle as a trunk for the fir tree.
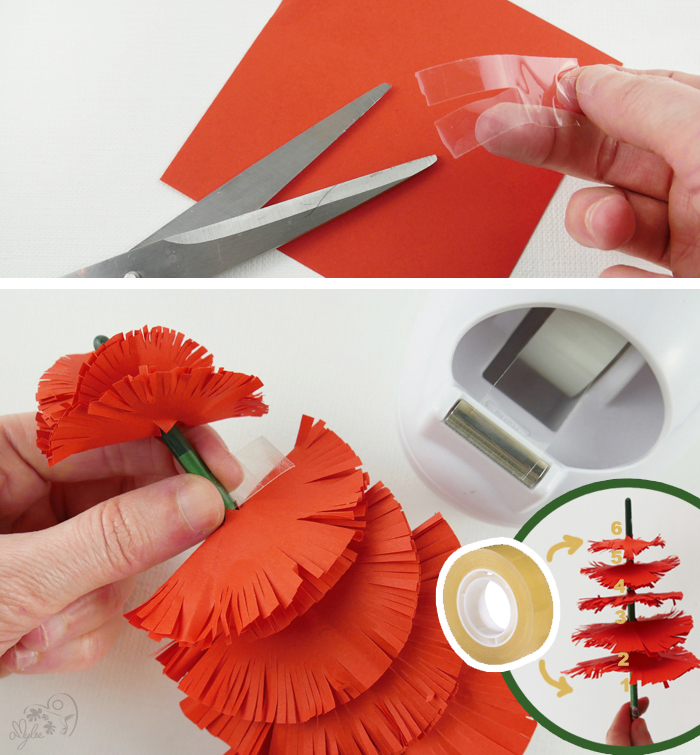
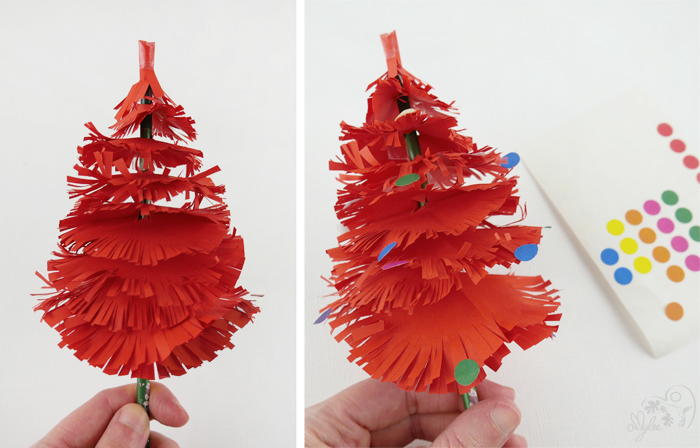
- After checking the space between the foliage, cut a small strip of transparent adhesive to prevent foliage slipping along the brush and to keep the spreads evenly. For 6 foliage, you need 6 strips of transparent adhesive.
- NOTICE: If adhesive is too wide, do not hesitate to cut it in 2.
STEP 6 – FOLIAGE TREE
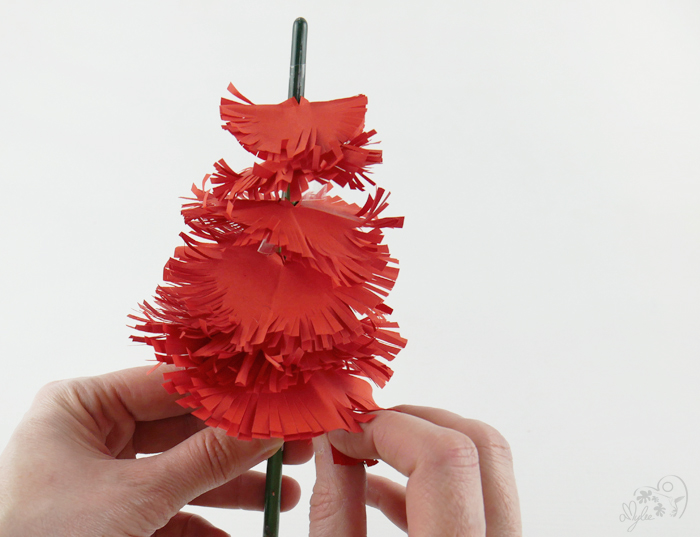
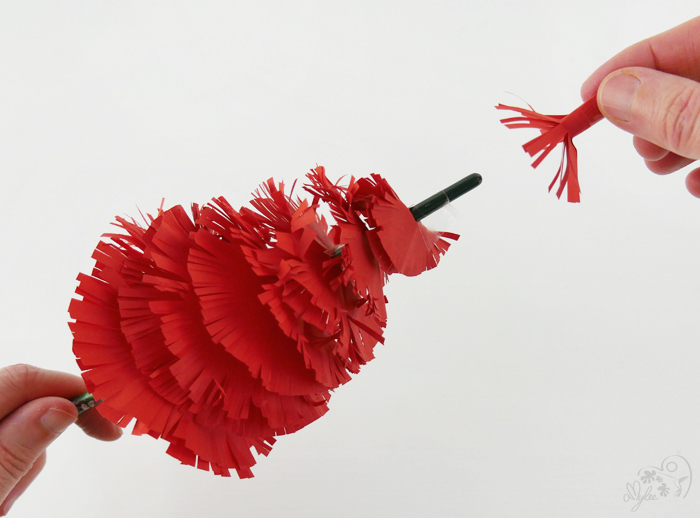
- After sticking all the adhesives, the foliage is now firmly in place. We can now give a little of swelling to the branches of the fir tree by splitting the sheets of paper.
STEP 7 – TREE TOP
- This step makes it possible to make a small hat to create the tree top.
- Using the small strip of folded and fringed paper, wrap it on itself while spreading the star-shaped fringe.
- Be sure to check that the top fits into the tip of the brush before attaching it with tape.
NOTICE: Do not hesitate to cut the top if it is too long.
STEP 8 – TREE DECORATION (OPTIONAL)
- I love the bare tree because but if you want to decorate the fir, the multicoloured stickers are then very practical!
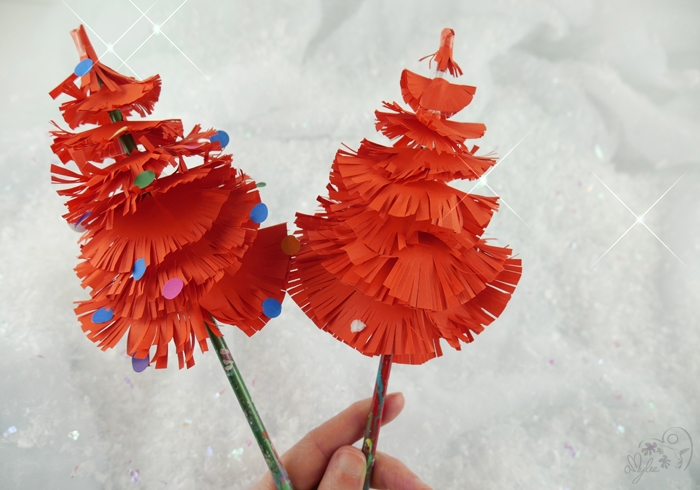
THE RESULT IN SOME PICTURES
And here we are… « My beautiful fir tree, king of forests …”
LITTLE TIP BEFORE FINISH
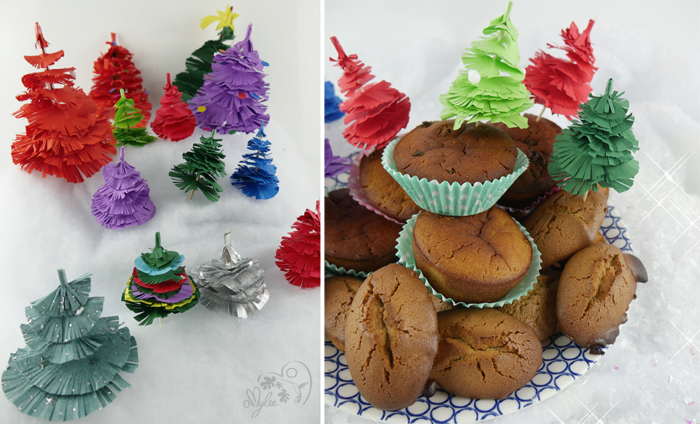
With brushes (but also with picktooth and skewered sticks), I wanted to make a nice assortment of coloured Christmas trees.
The mini trees were very pleasing to my husband’s pastries. Enjoy !!!
DISCLAIMER : cet article est une collaboration sponsorisée. Je fais partie des artistes référents qui utilisent le matériel proposé par Le Géant Des Beaux-Arts – France et GreatArt – United Kingdom. Vous venez de lire mon article issu de cette collaboration. Au risque de me répéter, sachez que j’apprécie les marques distribuées par ce partenaire depuis des années, et que je suis convaincue de la qualité du matériel destiné aux artistes et aux personnes créatives. Même si cela paraît logique, je précise que je suis LIBRE sur la thématique et le choix des produits mis en avant, LIBRE sur le contenu, LIBRE de donner mon VÉRITABLE avis, et c’est également pour cette raison que ce partenariat est important car je peux donner libre cours à mon imagination et ainsi proposer du contenu frais et de qualité.
